ShipHero Fulfillment – Managing Your Products
How to manage your products in ShipHero Fulfillment
How to manage your products in ShipHero Fulfillment


Yosef talks about a feature available for ShipHero WMS customers who want to manage custom workflows. Workflows are designed to help manage and order processes in the warehouse. We cover the options, how workflows can be setup with automation rules and how to run better processes in the warehouse.
How to Create Custom Workflows in ShipHero
How to Use Automation Rules in ShipHero
Workflows, like to set up custom workflows that can help for things, for example, like embroidery, gift wrapping or anything that requires something different than the typical package of flow. So, for example, if there’s embroideries, after you take the orders, you’ll be directed to bring those totes to a workstation where embroidery is done. You can set up multiple steps.
We’ll go through all that during the demo, but basically, as you set up that workflow to guide those products from picking through the shipping process, I’m on the to setting screen within the endeavor. Within it should be that and we have this new workflow section that allows you to set up and define your workflows. So I have defined a pretty basic workflow.
Give it a name, this case embroidery, and then I define which stations will be involved in this workflow. And that’s where you’re really setting up where these tools have to go in the workflow. So after I’m picked, after I’m picking those, those orders is going to tell me to go to that first station. And you see we have this edge start button if there’s multiple steps in this workflow.
Now when you define the stations, you can define more than one station that can support this workflow. So if you have five embroidery stations, you can add at all five of those stations to the workflow, and many of them can be used within this workflow. This case I just had that one defined. So after I think it’s going to tell me, bring those orders to the station so they can be worked on.
Then instructions again, very creative, do the embroidery. So after I’ve defined the workflow, the next thing I need to do is set up a rule to associate products with the workflow. Now, just to kind of tie things together, the way we typically work is on your store. That’s if, for example, Shopify store, you’ll have options that the customer can put in.
So and there are many apps out there that support that. So if you add to your product page the ability to import a name, let’s say maybe a color, other custom options, those would then be pulled into ShipHero. And then we wanted to find a way to know that those products need to go through this workflow. So we have within the automation rules for that here.
And you can see what I did is I added a product tag to my products. So I added products, I is called embroidery. And for any order that comes in with a product that has that tag, I’m going to set the workflow to the embroidery workflow. And again, this, this embroidery, that’s just the name I give the workflow when I set up the workflow.
Now, you know, you have multiple products in an order and there could be multiple workflows assigned to one individual order. So in other words, if you have an embroidery workflow and a screen printing workflow or a gift wrapping workflow, that one order can be can be directed to go through each each workflow in sequence. So it will take the order to the border, read machines, and after it’s done, it’ll be they’ll be directed to now bring those orders to gift wrapping or keep them to screen printing for the items need screen printing.
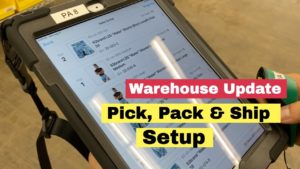
Once you’re done through all the workflows, it would then go to the shipping stations. So that’s how you define which orders, which products need to go through those workflows. Once that’s done well, then move over to the iPad where you can see how that works within the actual batch. So one thing to note is that this is for batch picking normally.
So in order to move products through workflow, they have to pick through multi and batch packing. So as you can see on my iPad, once workflow is enabled on your account, this is new option here when you’re creating a batch. So I’m just creating a multi item batch that hasn’t changed. I choose the number of totes and I choose the workflow that I want to go through.
So I decided to be no workflow needed. That’s just for your regular orders. But what do you do? Want to take a batch of orders that need to go through the workflows. You just choose which workflow you want to want that. And if there is a case where a product or an order is in multiple workflows, choose any of those workflows, work with those orders.
So I pick my batch and my two items, I some hoodies, and I’ll just simply pick them as as you normally would. And now I’m done. So now you can see something that’s new. After I’m done picking my my batch, since this is a workflow, it’s telling me to scan any station to complete. Now it’s good. And then give me a choice of stations.
That’s those stations that I designed when I set up the workflow and set the stops. So what I have to do is scan a barcode that has that weird station name. So I have one set up and I’ll just scan it. Once I scan, I’m done. Actually, I completed my batch, then will move over now to the computer again, a very familiar screen where I’ll scan the tote that I picked those orders into and it expanded to it.
This is where it’s a little different. So typically you would see the shipping screen. Since this needs to go through a workflow, it tells me that I need to now do this customization through the do the embroidery. Now, if I had scanned a tote at the wrong station, since I am associated with that station, the first station, if I scanned this tote at a different station or if I skipped ahead to the shipping station, it would alert me, would tell me that I do need to bring this tote to that first station.
So continuing the process, I would just scan the product or click on it. And here you can see the instructions, do the embroidery. And we did pull in from the order. It was custom option. So I have my name. ShipHero and the color red. And those were put in by the customer when the order was placed. We put those in as custom attributes, so the person doing the embroidery knows what they need to do.
So now I do the embroidery. Once I’m done it market is done. And you know, if there are multiple products that go through each one, I then click on customization completed and now it’s telling me to bring those items to that tote. So I’m basically checking them back into the tote so we know where they are. Since there is only one stop that is workflow, the next one is going to the shipping station.
So if there was another stop, So if this was now going to screen printing for other products or gift wrapping or any other workflow that you needed, it would tell me where to bring it. In this case, again, there’s nothing else to do. So I bring it to the shipping station. At the shipping station that would look like any other order and I would ship it out.
Click below to either login to your ShipHero Software account or your ShipHero Fulfillment account.
And welcome back