.svg)

Explore live demos, WMS feature walkthroughs, optimization strategies, success stories, and expert tips to optimize your eCommerce and 3PL warehouse operations.
.webp)
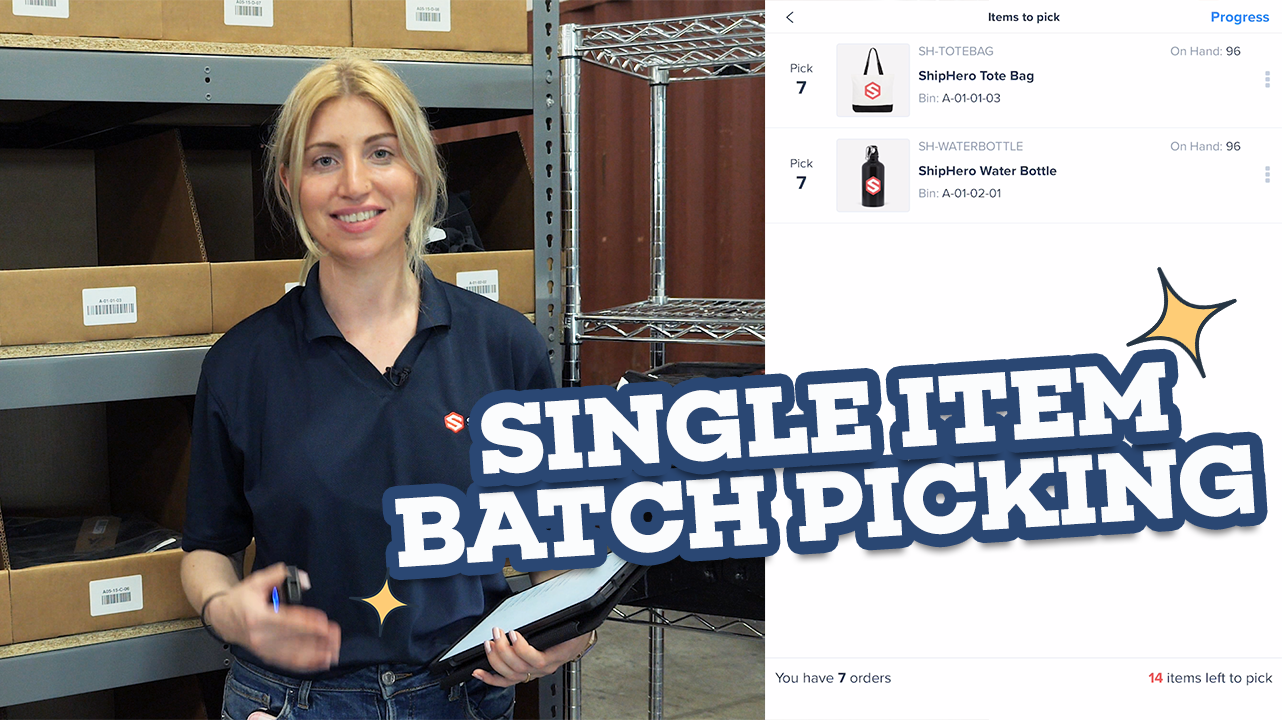
Speed through a ton of orders with only one or two items by using ShipHero’s Single Item Batch picking. In this video, Product Manager Val will show you how quickly you can pick dozens of orders with just one or two items. SIB is especially helpful for warehouses with monthly subscription boxes, specialty merchandise drops or just a really popular product that sells a ton all at once.Increase your picking speed and accuracy when you use SIB with ShipHero. Watch now!
Hello, everyone. This is Val here at our West Palm Beach warehouse. We're going to take a look at single item batch picking today. Single Item Batch picking, is a little bit different than multi0item. So we have a video on multi-item batch picking which focuses on picking multiple orders with more than one item and each order is in its own tote. Now, single item batch picking is a little bit different. In this case, you're still picking multiple orders, but each order has one item, single item. But those items can be different. So we like to do because items can be of different sizes, is we'll get a cart, we'll have a bin here with our tote barcode. Smaller items could go into the bin and then anything that won’t fit goes onto the cart. But this is all going to be one tote and all of the items we pick for the various different orders will all be put on here. It's a little bit different than the multi item set up, but efficient when you're trying to pick a lot of orders with one item and just kind of get them out the door. All right, so let's start picking a single item batch. So we're going to do is we're going to go to our mobile device and you'll see here all single item batches. Well, you have two ways you can access this. You can go from the main screen. It's single item batch there. Or if you happen to be in the navigation bar, you also can access under the picking section. Either way is fine. You'll go to the same place at the end. So we'll hit single item batch and it's going to ask you to scan a tote. This could be any tote that you have that is currently not being used by other orders. We'll scan that in and it will load a single item batch. This will be a mix of items for orders with only one item. All right. So step one, it will tell us what location to go to and we're going to go pick some of these. So we need seven of the totes from this bin. So let's scan an item in, let’s make sure confirm we're picking the correct item. So we're going to scan in the barcode and it's going to tell me I need to pick six more. And once you're done, you can either hit, confirm or scanning the tote to confirm. All right. We confirmed that we picked seven of the first item and they are in our tote. So now we're going to move on to the next item. ShipHero will tell you which location to go to and once again, we're going to pick the first item and scan the barcode to confirm that it is correct. The app will tell you which tote to go to, and then you'll just place it in the tote and pick the rest of your items. So for our last one, I'm going to show you that you don't have to scan each one. Though we do consider this best practice in the event that a barcode is missing or an item is not barcoded. You can go on to your mobile device and click plus one, put that in your tote and then scan the tote to complete it. So we picked all of our items. We finished our batch. Now we will complete here. So we just finished picking a ton of orders in only a few minutes. That's one of the perks of single item batch picking. It is very fast and efficient to get orders picked quickly and over to the packing station so they can be shipped out. So let's go bring these orders over to our pack station and see what comes next. Thank you for watching.
.svg)
Our newest feature, Mobile Replenishment, makes your warehouse team more efficient and cuts down on errors when dealing with your most expensive asset, inventory! To find out more about how Mobile Replenishment works and how easy it is to implement in your warehouse. This walk-through video with our Product Manager, Val will help answer your questions and give you a great example of why this feature is so important to making your warehouse more efficient. Watch now!
Hello, everyone and welcome to another episode of ShipHero Feature Walkthroughs, I'm joined today by Valerie Cancian, our associate product manager. How are you today? Hello everyone. I'm doin' great, how are you Danno? Awesome, I'm great as well. So today we'll explore mobile replenishment, right? That is correct. Please tell us more about this feature. I'm very excited to show this one. It is a replenishment report, which ShipHero currently has a replenishment report, but you have to print it out, and do have some manual processes, we're very excited, we are now offering replenishment directly on our mobile devices. This will allow you to see your report on your ShipHero Mobile, and then you can choose which items you would like to replenish, and do the entire process through your mobile device, which makes a lot more sense, since you're transferring inventory, which is usually a mobile function, anyway. So I'm super excited to show this to you all, so, I'm gonna share my screen. To access your replenishment report, you're gonna go to your navigation, on your ShipHero Mobile here. And you will see under the product section, this is where you would do inventory transfers or cycle counts, you'll see there is now a new section for replenishment. When you click that, you will get your replenishment report. So these are all of the items that fit under one of two conditions. So first you're going to see SKU that are allocated to orders, so these are items that have an order that needs to go out, but there's not enough in the pickable bins. So you need to go to your non-pickable bins, your overstock, take some, and move it to the pickable bin, so they can be picked, and the orders could be shipped. So that's one reason items will be on a replenishment report. We also have cases where you can set the replenishment level. So this is an existing functionality. But on the product page, you can set some sort of threshold, so whenever the amount in the pickable bins is under that level, it will flag it and it'll show up on the report. We show these separately. So this is going to be those that are on an order. These are usually more urgent. 'Cause orders need them now, so we kinda wanna highlight them. But if you go to the top right, and you see your filters. You'll see here it says Inventory Status: SKUs allocated to orders. You can change this, and make it for those not on orders, so this is only looking at that replenishment level. And then when you apply that, you'll see that there'll be different SKUs, so these orders don't currently need them, but we want to replenish them, to be proactive, to get them in the pickable bins. Maybe we know that we're gonna have a sale, and these are gonna be sold, so we want them there, ready to pick beforehand. So there's two different views from this report. The replenishment report can have a lot of items on there, and it's important to be able to prioritize which SKU you want to replenish first. 'Cause it's amazing, as we wish, you can just tap and it'll just magically move everything in the warehouse right away. We do need to prioritize our work here, so, when you go to your filters, we have some options. You could filter by order status. This is important, again, for orders that need to ship now. So for example, if you have an order with a priority status, that can't be shipped because there's not enough in a pickable bin, you can filter by that status, items needed for orders with that status will show up, and then you can choose those and prioritize them. Same thing with tags. You can tag high priority orders, and then SKUs needed for those, so they can be shipped, will be prioritized. The inventory status, you could prioritize only those that are ready to ship. This would exclude things that are back-ordered that would be ready to ship no, so, they're not as important 'cause they can't ship yet, as well as things are in progress. So the in progress. This is a new filter, which is very cool. As you can see, I'm looking at the report, but say Danno is gonna help me with my replenishments. He's gonna log on to the same account, same report, he'll be able to see the items that I choose, and start replenishing, those will show as in progress, so he knows not to choose those, there'll be an in progress status on them, so he can work off the same list and choose different items. So that's what the in progress filter is, so you can hide those if they're in your view and you just don't wanna see what's in progress, you can hide them. Once you apply your filters, you will see your list, and you'll choose how many items you want to put away, basically to do your replenishment, you can do one at a time, choose an item, go through the flow, come back to the list. But we generally suggest you kind of pick a subgroup, and that's the group you'll be working on. And that way, when a colleague of yours goes on the list, they can then take a different subgroup. So, you'll see here, on the left hand you have some checkbox options. You can check. This is now locked to me, it's gonna show as in progress. And you can choose as many as you want, if you realize you actually don't want to, you can unselect one. And what you'll see here are these locations, these are the not pickable locations that have enough to restock these SKU. Now you can change this. It's gonna default a suggestion for you. If you're short on time and you wanna replenish things, ShipHero's making a suggestion. But if you do click, you'll see, if there are other locations for this item, you'd be able to change it, let me find you a better example. Here we go. So this one has 25 here, 25 here, I need 11 in total. So I could have gone with either of those, but if I wanna do the other location instead, you can do that, you also could pick multiple locations. So if I needed to replenish 50, I could choose both, and that's completely okay. So let's choose which items we would like to replenish. So in this example, we need to replenish 55, this is based off of both the replenishment level, and the orders that need this. 'cause both numbers are taken into account for this calculation. We don't have enough, it doesn't mean that we can't replenish it, we replenish what we have. But it will give you a notification, just a visual, that you didn't select enough. Alright, let's go to our put away list. So I'm just gonna do these two items for now. I'll leave Danno with three items, 'cause I'm very nice. Alright, so you hit Put Away. So now those two items, these are now locked to me. If I were to quit this and not complete, it will unlock and then someone else can choose it from the replenishment list, but right now, they'll show as in progress to my user. You'll see here I have two SKUs, 20 units to replenish. And now we're going to go, so now we have to go into our warehouse. We need to go to this location, and go get these items, so, I'm going to go to my overstock location and then I'm gonna be asked to scan in this location to confirm I'm at the right spot. Now if you get there, and for some reason the item wasn't there, you can still edit this, you can change it, that's what the little pencil icon is for. But hopefully it is actually there and you're able to proceed, so I'm goin' to scan in this location, via our handy dandy scanner. Alright, and that will show you the item, so I need to pick 11 of these. You can scan them in, and pick them from this location, or you can also just manually type in how many. Now, a few things to note here, which is pretty cool. We need 11, this is based off of orders that need this, as well as their punishment level. Sorry if I'm saying that too much, but that's where that's coming from. You'll see when I grab the first five it's gonna tell me I need six more. But I see I have 25 here. Maybe you want to just take all 25 and replenish all 25. That's completely okay, it will show you in the UI here that you are picking more than what we suggested. But it's not gonna stop you, you will be allowed to proceed. So I'm gonna do all 25 'cause I'm an overachiever here. And then we're gonna hit Continue. Alright, so we've taken these down, kinda, we're gonna have to use our imagination here. We've taken them from our overstock. Now we have to tell ShipHero where are we putting them, 'cause they're not in overstock anymore. So you have a few options, depending on your warehouse, your warehouse setup, and your overall process. You could take them and put them straight into a pickable bin, their final destination. Or, you can take them and put them in like a transfer location, maybe like a cart, or some sort of a bin, like a tote-ish sort of thing, that you can take that, put them there. We'll do the transfer, so we'll move it to this location, and then you can replenish the next one, put that in the transfer, and then put them away. So if you're in like a bigger warehouse, that might be an easier flow. So I'll show you how to do that in the mobile part. So, it's asking me, okay, where are we putting these? When I hit the little pencil icon, it's gonna give me some suggestions, it's gonna tell me, one, where this SKU already exists, so if I want to just go put this where this SKU already is, that would be this top location. It's also going to show me some of my transfer locations, so these are usually not pickable, not replenish able, 'cause we don't want them showing on our replenished report, they're pretty much a tote that you're gonna be carrying around. I could also choose one of those. It'll also show me some empty locations that I could move these to. Or you can just scan a location as well, so I'll give you some suggestions. Or you could just scan a location and say, hey, that's where we're putting this. I'm gonna show you a little bit of the transfer location... So I just scan it in. Alright, so this is my transfer location. You'll see it now says TO-3. Then it's gonna say, alright, how many are you putting here? The reason it's asking this is 'cause you have another option, we like the options with this feature. You could put all 25 in the transfer location and now move to your next item. Or, maybe you want to split it up, you're going to put the first 12 in the transfer location, and now you want to put the remaining 13 maybe in a different location. This would be more useful if you're going straight to a pickable bin, and then you realize you can't fit all in one, so you're like, okay, I put the first 10 here, I can't fit anymore, and I'll put the remaining 15 here. So it allows you to split, so you're not tied to just one location, which would be quite inconvenient. So I'll hit Split Item Putaway. Alright, and then I'll choose another location. And I'll put the rest there. And again, you can scan this, you don't have to. I know we have some big fans of scanning, so, you definitely can scan. And then once that is done, you will go on to your next SKU. Once we finish our first item, you'll be brought back to your list, and you'll be able to choose your second item, and then we just repeat the process again. So, we'll choose which item we're gonna go replenish. We will scan in the location. To confirm, and then it'll tell us how many. Here I'm required to pick nine, there's 100, but I'm just gonna go with the nine this time, I don't feel like carrying 100. And then, where am I putting this? So, I'll look at our suggestions. Okay, so we currently have 11 in this bin, 11 in this bin, eight in this bin. Or, again, we can do another transfer location. I'm going to go with just choosing another location, and then we can put all nine there. And once that is done, your putaway will say Complete, and you can head back to Replenishment. And this will bring you right back to your replenishment report, you'll see that the items that we did have been removed. And these are the three items that I very kindly left for Danno to complete. As well as, if we change our inventory status, we also have these. A thing to note, you can choose one from here, and then change your filters. And then choose one from each list. You're not stuck only choosing for one set of filters, as the filters are changed, you can update your replenishment list. And then when you hit the bottom here you can see what you have chosen. And that's the replenishment mobile flow, pretty straightforward, easy to use, and hopefully more efficient than a paper and pen method. And everything is tracked, everything is logged. All of these movements will be in your inventory change logs, everything is there, so you'll know where your inventory is at all times, which very reassuring. That's super useful. To know where things are, yeah. Absolutely. Thank you very much, Val, and if you'd like to check out other feature walkthroughs, click on the top right corner, and if you're ready to unlock your eCommerce performance superpowers, visit ShipHero.com. Just schedule a call with us. Thank you for watching and have a great day. Thank you!
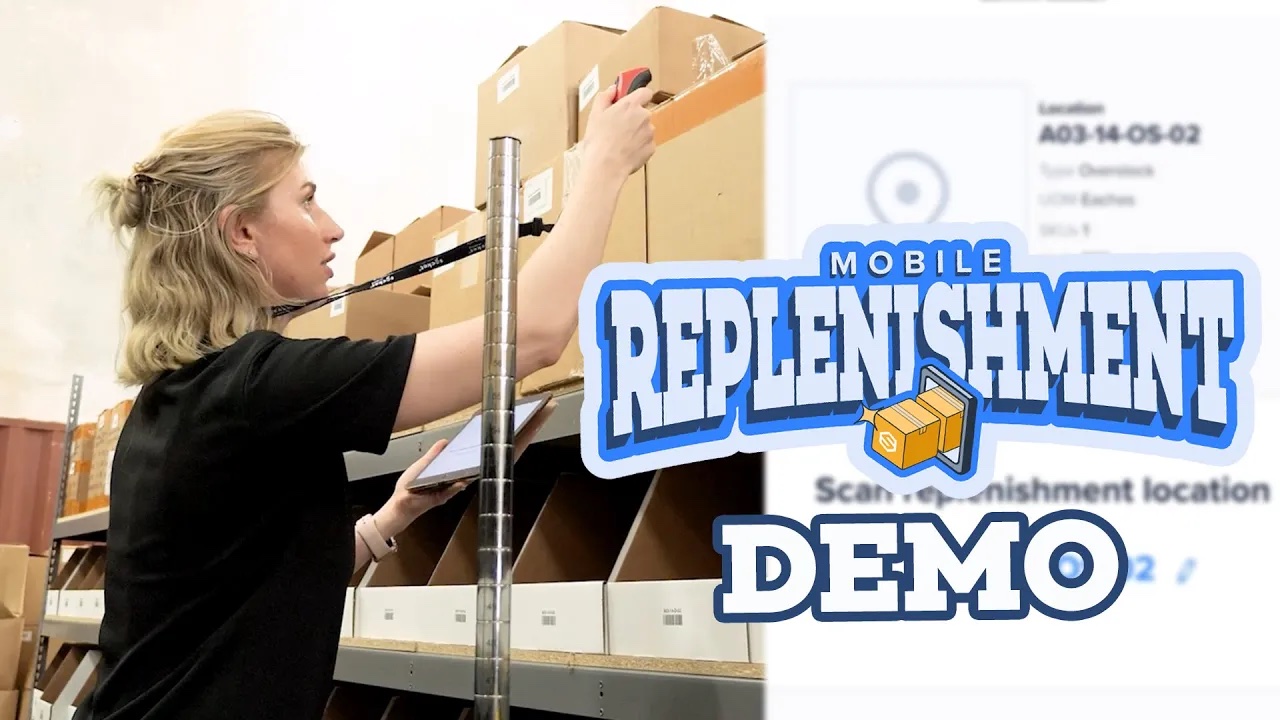
Make sure your replenishment process is accurate and quick with ShipHero's new Mobile Replenishment feature - available now as part of our 2023 Spring Release! Our team has heard your pleas - make it easier to replenish! And now we have - you don't need to print out spreadsheets or find a scrap of paper to scribble down an inventory location, or even try and just remember it! With Mobile Replenishment available through ShipHero's mobile app, all the info you need is in the palm of your hand and replenishment is just a few taps away.
Hello everyone, this is Val here today at our Palm Beach warehouse to show you our new Replenishment feature. For those that aren't familiar with Replenishment, Replenishment is taking stock from an overstock, non-pickable bin and moving it to your pickable bins. It's very important to have enough stock in your pickable bins that you can fulfill your orders and get all your orders out the door in a timely matter. So, in order to do replenishment, we need a few things. Most importantly, our mobile apps. You can now see our Mobile Replenishment Report. You're gonna need a scanner and then some options when you're doing replenishment which I'm gonna show you a bit more in detail. You can have a transfer location, in which case you would take inventory from overstock, move it to a transfer location. This is all tracked in ShipHero with the Replenishment Mobile. And then from the transfer location, you can then go put it in a pickable bin. This is very useful, if you're going to be doing a lot of replenishment and may be need a forklift to go take down pallets of stock and you wanna just move that into a transfer location and then put away. You don't need this step though. You can also just take from overstock and put directly in a pickable bin. Either is fine. All right, let's take a look at our new Replenishment Report, which is on mobile. These are all items that need to be replenished for one of two reasons. Either one, we have orders that need this item but they're not in a pickable bin. So they'll show on a Replenishment Report. Or you also can set something known as a Replenishment Level. This is very useful for being proactive. If you know you're gonna have a sale of an item and you want them moved into a pickable bin beforehand, you can set a Replenishment Level, have everything restocked beforehand and then as those orders come in, you don't need to replenish at that time. The report looks at both of those numbers and do all that math for you. It's all here. From the Replenishment Report, we have some filter options which you can use to be a bit more strategic about what you're gonna replenish first. Sometimes Replenishment Reports can be, they could be hundreds of items really depending on, if it's a busy season. So you might wanna filter in order to focus on maybe a specific customer's items or maybe focus on items that are needed for priority orders or certain items with different statuses. That's what these filters are here for. As you can see, you can go to filter and choose one of your customers. If you go to "Order status" you can sort by, let's say, priority status. So any order that's on priority that needs to ship now, you will replenish those items first. This allows you to be strategic with what you are replenishing. Once your filters are set, you can choose one or more items to focus on. What's great about this Replenishment Report is you can have multiple people working on replenishment at the same time. So I'll go in and I'll choose which items I want to replenish, and once I choose those, they're gonna be locked to me so I'm gonna work on those but then my coworker can come in, pull up this report and choose different items to replenish, make their own report and there won't be any overlaps. You're not replenishing the same thing as your coworker and then you're over replenishing and having any trouble with that, which is a big benefit here. So we'll choose a few items. What you'll see here is, the Replenishment Report is making a suggestion of a non-pickable bin that has enough in hand to replenish what ShipHero is suggesting. So ShipHero will make a suggestion, but depending on the item, you may have other options to choose from. So let's take an example. For this item, it's making a suggestion but if I click the location, you'll see that this is also in other "Overstock" locations. So I can choose a different location. I also can choose more than one. If, for example, I wanted to deplete one location that maybe only has a few left, I can empty out that one and then choose another location for anything else. For example, this one has only two. So if I wanted to grab the remaining two there and replenish those, and then I need 18 more, I can choose another location and then hit "Save." And then I will go to each of those locations to pick from. Once we've decided what items we would like to replenish, we're going to hit "Putaway." And now we're going to go through our flow. So it'll show me what item that we wanna replenish first, where to go. And now I'm gonna go get these items. So come along. All right, so we are looking for location A03-OS-02, which we have right here. So what I'm going to do is, it's gonna ask me to scan in my location to confirm I'm at the right place, which is useful. I tend to get lost, so. All right, confirmed. Now I need to replenish 43. So we're gonna get this box down. So the mobile app is gonna ask me to scan in. You also can manually select, but scanning is a good habit just to make sure you have the right item. So I need to get 43 of these for my replenishment, so. I'll scan the barcode. It is the correct item, so it added one, and it tells me I need 42 more. Now, you will be allowed to replenish more than our suggestion. Remember, ShipHero's suggestion is based on the Replenishment Level and the orders needed but say, we're telling you 43, this location has 50. You just wanna replenish all 50, that's fine. It will show you in the UI that you've gone over but it won't stop you in case you do want to do that. So I'm gonna keep picking these. All right, so we picked all 43 of our items. Now we have to put these away. So we have a few options. We can move them into a transfer location, in which case the inventory will be deducted from your overstock, move to a transfer location. And then later someone else will scan in the transfer location and use the Putaway flow to put it in its final pickable bin. Or I can put this directly into a pickable bin from here, or I could do both. So I'm going to show you how to move into a transfer location but then also how to move directly into a pickable location. So we'll start with the transfer location. We're gonna put 33 in our transfer location. So this is my transfer location here. All I'll do is I will scan in my location. This is to tell Shapiro where this is going and then I'm going to input that I put 33 in this bin here. So we moved 33 from our overstock into our transfer location. We still have 10 more to replenish, so we're gonna take these 10 and put them directly into the pickable bin. So the Replenishment Report will show me suggestions based on where this skew currently exists. So looking at my report, turns out our pickable bin is very conveniently right over here in C-04. So we're gonna take these 10 and put them straight away here. So this will do the transfer from the 10 to the overstock directly to this pickable bin where they can be picked, shipped, out the door, once they're ready. So you can scan them in. You're gonna confirm when you pick 10. You also can manually input. You don't have to scan each, but we'll scan in for all 10. All right, once those are all set, just hit "Confirm" and complete replenishment, and we have replenished our skew to both a transfer location, as well as a pickable bin. All right, that's it for our Replenishment Mobile demo. I'm gonna get to work putting the rest of these away but I hope you have a great rest of your day. See you soon.
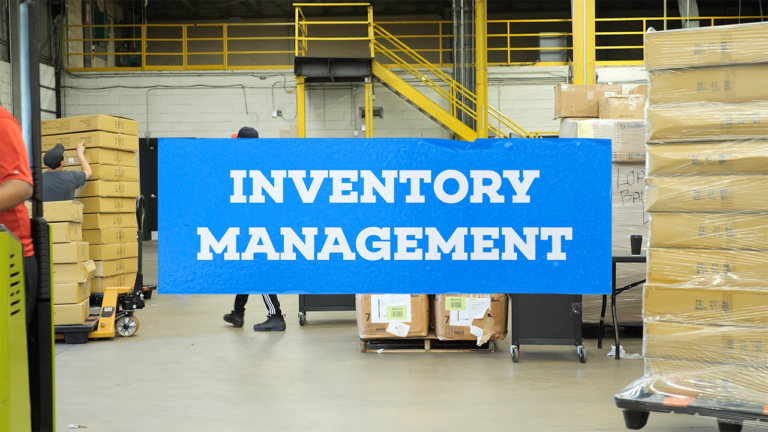
Are you tired of struggling with inventory management for your eCommerce store? 🤯 Don’t worry, we’ve got your back! In this ultimate tutorial, we’ll show you how to navigate inventory management in ShipHero like a pro, saving you time and stress! 🚀🎉
Inventory management is a 🔥 hot topic for eCommerce store owners and 3PLs alike, and for good reason. A well-organized inventory is the backbone of any successful business. That’s why using ShipHero WMS is one of the best choices you can make! 🌟
In this video, we’ll dive deep into:
1️⃣ Connecting your eCommerce provider to ShipHero software
2️⃣ Creating items individually or uploading in bulk through CSV
3️⃣ Keeping track of your inventory with location types (bins, receiving, overstock)
4️⃣ Managing inventory in real-time across all channels
5️⃣ Transferring orders and inventory between warehouses
By the end of this walkthrough, you’ll be an Inventory Management Master with ShipHero! 💪
Welcome to our how to video on inventory management in ShipHero. ShipHero’s powerful and easy to use inventory management system enables you to track your inventory availability and synchronize it with any connected selling channels. Are you ready to get started? Let's dive in. First, let's set up your inventory in ShipHero. We recommend connecting your sales channels to ShipHero. Importing your products is super easy and happens automatically. As you add new SKUs to your eCommerce sites, we download them as well. Products can also be created in ShipHero individually or uploaded in bulk through CSV file. You can also create kits, a great option if you sell items as part of a bundle. These can be created individually, as shown here or in mass through API or CSV upload. Then, of course, you must assign barcodes to your product. This can be done in several ways so you can find the one that fits your product mix best. We pull your product barcodes from the sales channels to make your life a little easier. If the SKUs don't have barcodes, ShipHero will automatically generate one for them, and then you can just adjust them in bulk later. Keep track of your inventory by creating different location types such as bins, receiving and overstock. This gives your team complete control and visibility of the stock available and ensures that ShipHero knows precisely where your products are stored. Locations can be either pickable or non-pickable. If locations are marked as pickable, the app will send pickers to the locations to pick orders. If locations are marked as non-pickable, the app will leave these off picking routes for orders. Great. Your inventory is now set up. Let's move on to managing your inventory in ShipHero. ShipHero breaks down your inventory into a variety of categories. However, your dashboard will always show the following: on hand, the total number of units physically in your warehouse. Allocated: what you owe to your customers for open orders and what is available to sell. You can also filter your inventory views into additional categories such as backordered quantities, warehouse location, or product tags like summer sale. Among many other options. We update inventory in real time across all sales channels so you can prevent overselling. Next, here you can receive inventory into your warehouse using purchased orders. Then you can use the mobile app to put away the items. The app also has a replenishment report to ensure pickable locations have enough inventory to process pending orders. And finally, you'll be able to pick, pack and ship orders. Inventory Management and order management features go hand in hand, so the picking team will only be sent to process the orders that have enough inventory available in picking locations. Now let's explore some additional features to make your inventory management even more effective. Use barcode scanning to manage inventory more efficiently. Conduct cycle counting to audit inventory levels regularly. Set automatic reorder points to ensure you never run out of stock. Use bin locations to organize inventory within your warehouse. Manage multi-location inventory across multiple warehouses. Hooray! Now you're all set to optimize your inventory and manage your warehouse like a pro. If ShipHero doesn't get you excited about inventory management, nothing will. Ready to learn more? Check out our website and YouTube channel for more feature walkthroughs and tutorials to help you master ShipHero software and happy inventory managing.
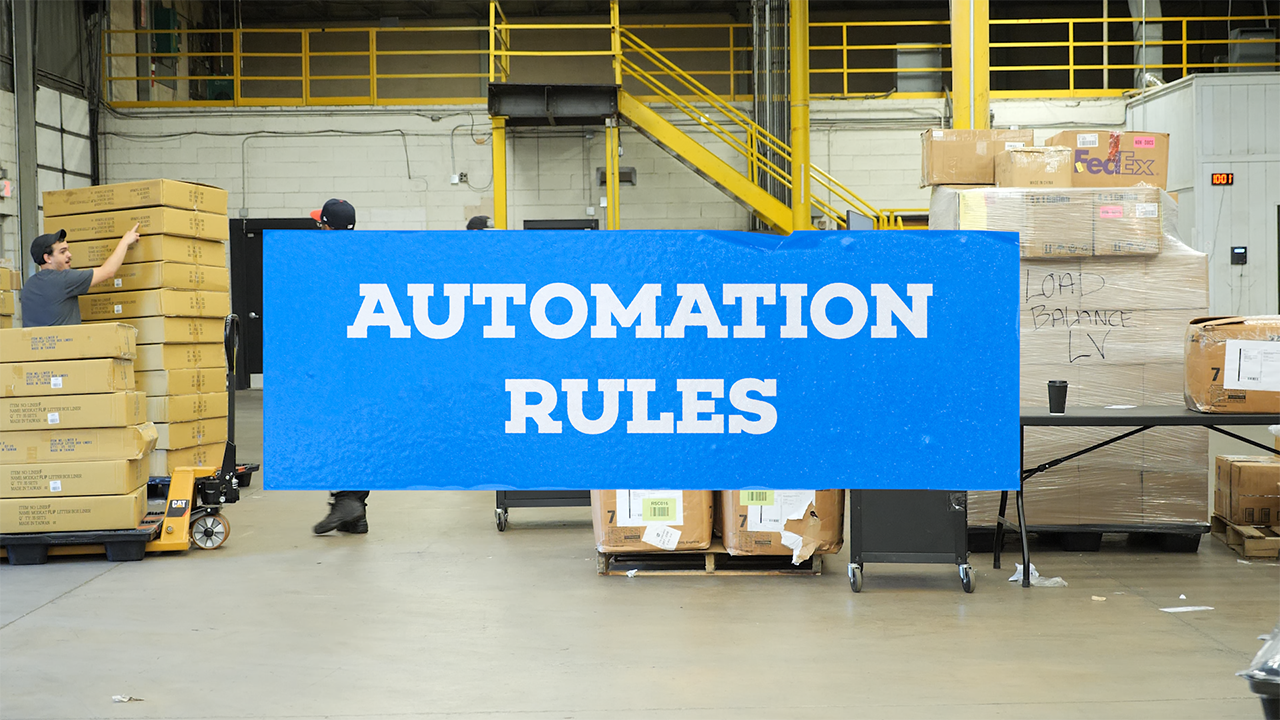
Get ready to revolutionize your workflows with automation rules! In this demo, we'll show you how to create these powerful rules that can take the guesswork out of your processes. Say goodbye to inefficient workflows and hello to streamlined operations for your pickers and packers. We'll cover three simple steps to help you find the best shipping rates, organize your orders, and automate your entire workflow. Join us and unlock the full potential of automation!
How to Use Automation Rules Help Doc
Welcome! Today, we’ll be exploring the power of automation rules and how they can take the guesswork out of your workflows, helping your pickers + packers to work more efficiently. During this demo, we will cover three key steps to creating automation rules that will allow you to find the best available shopping rates, organize your orders, and automate your workflows. Let’s dive in! First, you’ll want to ensure that your shipping methods are automated so you always find the best available shipping rate per order. Multi-carrier integration and real-time carrier rate shopping will help you save time and money. Importing order tags from your eCommerce platform, like Shopify, can automate your processes even more. These preset tags can act as triggers for your automations in ShipHero. Let’s jump over to Automation Rules and explore some of our clients’ most popular use cases for automation rules that help with consistency across the fulfillment process. VIP customer treatment: Add a gift SKU or marketing insert to their orders, give them express shipping, and prioritize the order on the day it needs to ship. Pre-sale items: Use automation rules to set an allow partial flag on SKUs marked for pre-order. Warehouse notes: Add a warehouse note to orders with SKUs that require extra instructions for packaging, particularly useful for fragile items that need special handling. Finally, automate box type selections to streamline the packing process. Here are some key takeaways about using automation rules within the ShipHero software. 1. You can automate key components of your order management workflows to optimize efficiency and reduce human error. 2. You can use automation rules to perfect your customers unboxing experience. 3. You can continually evaluate and update your automation rules as your business grows and evolves. With automation rules, you can tailor your ShipHero software experience to be exactly what your business needs. If you want to enhance your fulfillment process, remember that the possibilities with automation rules are endless. Unlock the full potential of your fulfillment business and drive your e-commerce business to new heights.
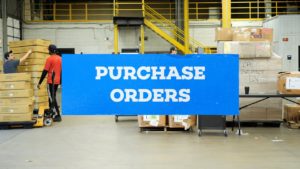
This How-To Video walks you through ShipHero's easy-to-use Purchase Orders & Receiving functionality. Check out how easy it is to manage purchase orders, report damages and receive shipments with ShipHero.
In this video, we demonstrate the following:
- Managing All Purchase Orders
- Creating a Purchase Order
- Receiving a Purchase Order
- Printing Barcodes from Receiving Page
- Receiving Products to Multiple Locations
- Rejecting Units
- Over and Under Received Products
- Editing a Purchase Order Later
- What Comes Next
In this video, we will cover utilizing and managing Purchase Orders or POs in ShipHero. With Purchase Orders, you can replenish and receive inventory into your warehouse quickly and easily. Let’s go ahead and open Purchase Orders in ShipHero. Here you can see all our existing purchase orders. You can filter them by a handful of different variables including date, vendor, and status. First, let’s create a new purchase order in app.shiphero.com. We have all of our vendors already added, so we can select which vendor we want to create a PO for, which warehouse it’s going to and the total amount of products for the PO. There are some options for auto-adding which can be based on the reorder level and reorder amount set in the product settings. …or we can add the products individually to the PO and then input the quantity needed for each product and hit ‘Save Order.’ You can also add prod ucts at purchase-orders.shiphero.com once the PO has been created. This allows you to add several different products at the same time. After that, we can change the auto-generated PO number, add the tracking information once we have it, enter the expected ship and arrival dates, and upload any attachments if needed. The quantity added to the Sell Ahead column will be added to the available inventory quantity on your various sales channels. You can add to the sell ahead field while creating the PO, or update it at a later date if needed. ShipHero allows you to email the PO directly to your supplier. If you’d like to create the PO outside of ShipHero it can be uploaded into the system or pushed in through the API from your accounting, ERP, or procurement system. Next, let’s check out a PO that’s ready to receive. We can see products, a timeline and notes, and any attachments that have already been added to the PO. The warehouse team can also upload their own attachments or images of any product that arrives at the warehouse damaged. If we have any notes for our vendor or the warehouse, we can see and update those easily. The timeline will show us all the changes on the PO since its inception. We can also update the status of the PO. Once the shipment has arrived and we are ready to begin receiving the inventory, users can scan in each individual item or scan to receive by the case if cases have been set up within the system. If products arrive without barcodes, quantities can be manually entered for each line item. If you need to print and attach product barcodes as part of your receiving process, you can do so by selecting each product and then selecting Print Barcodes. If several groups of products are in great shape, you can receive the products with no issues to report by selecting them and then selecting ‘receive as expected.’ On the receiving page, you can choose to receive all line items to a single warehouse location or split the line items to receive products into different locations as shown here. If items arrive damaged, you can reject them from inventory here and add a reason code and note. A history of rejected items can be found in the PO Rejected Line Items report. Then hit save. If you received more or less units than you ordered, ShipHero will indicate that these line items have been ‘over or under-received’ which is also included within the reporting. ShipHero knows that sometimes you notice issues after you have finished the receiving process. That’s why you can even edit after the PO has been closed previously. After bringing your inventory into your receiving location, you can easily put it away using our mobile app. Watch our feature walkthrough video on Putaway to learn more. To find out more about how to receive inventory using ShipHero’s purchase orders feature, visit our support knowledge base. And don’t forget to subscribe to our YouTube channel for more content on how to use ShipHero’s WMS. Let’s Get Shipping!
Guesswork is gone with ShipHero's New Putaway feature! Available on our Mobile app for our dynamic slotting, SaaS clients, Putaway gives you the ability to create workflows around putting items away. Scan the item, the location or a case to get the process started. For more details on Putaway and how it works, watch our guided walkthrough video here.
00:06 Host: Hello everyone and welcome to another episode of ShipHero Future Walkthroughs. I'm joined today by Yosef, our superior VP of Products. So how are you today, Yosef? 00:14 Yosef: Doing well, Dan. How are you? 00:17 Host: Awesome, yeah, I'm good. I'm good. So today, Yosef would walk us through a great ShipHero feature. Put it away, that's right. 00:30 Yosef: That's right. It's a new feature just coming out. So excited to walk you through it. Yeah. So Put Away is a new feature for the mobile app, and what it allows you to do is build a workflow around putting inventory away. So whereas right now, you may take inventory from your receiving location or where it is in storage and just do inventory transfers, this allows you to build a list of what needs to be put away and it walks you through putting that inventory away. So as you'll see, we'll show you what needs to be replenished, where else that inventory might be now, and it makes that process a lot easier and more accurate. 01:18 Host: So we can just jump into the mobile app and I'll kind of show you how that works. One thing to note is that this is for dynamic slotting only. So if you're on a static slotting account, this wouldn't be a feature available to you. If you do want to switch to dynamic slotting, you reach out to us and we can help walk through that process. Good to know. So as you can see on the mobile app, there's a new option in the product section called Put Away. And when I go there, I have my Put Away screen. And to start a Put Away, I need to scan something, and that can either be a location that has products in it or an individual product. 02:18 Yosef: So to take an example, I'm going to scan a receiving location. And you can see there's three products in that location currently. So it's added those three products. I have my scarf, my gloves, and my hats. It has the quantity in that location, so that's what's currently in receiving. And it shows me other information. So notice that first one, scarf, it says I need to replenish that, that replen tag. And that three that you see on the right side, that's how many I need to replenish. So this is telling me right away that this product needs to be put in the picking location. So whereas maybe I'm going to put some away, my overstock, I need three replenished, those need to be picked. So it's telling you right away that at least three of those need to be put in a picking location. 04:21 Host: Now, from here, I can actually add other products as well. So once I scan one location, I can scan additional locations and add products. Or I can scan in the individual products. So for example, if I scan, I have a snow shovel, that'll add that to my list. Now, if that product is in multiple locations, it'll ask you where you're getting it from. And we'll look at that later as well. So once I have my list ready, you can see right now this list is in draft. That's on the upper left there. I can start my Put Away. And all I do is tap on the Start Put Away. And now it's taking me into that Put Away flow. 06:38 Yosef: Now, at this point, if I'm done Put Away for whatever reason, I don't want to put these away, I can incomplete. Everything is saved. So in other words, the ones I put away are put away. If I mark it as complete, the other two products that I didn't do yet will be taken off the list. And I can always start another Put Away to put those away. But what I've done is saved. That's not going to be lost. 08:23 Yosef: One thing to note that we're working on probably for early next year is a more guided Put Away where we'll actually suggest locations to put them. So for example, if you're receiving, you will use different rules and different criteria to say, "This should be put in location A, not location B," based on many different factors. We're still working out what that'll be based on and how that'll work. That's something we want to layer on top of this Put Away to actually make it more guided and suggest where to put the inventory. 09:10 Host: Awesome, awesome, Yosef. So thank you very much for your explanation. And to everyone, if you'd like to check out other feature walkthroughs, click on the top right corner right now. And if you're ready to unlock your eCommerce fulfillment superpowers, visit ShipHero.com to schedule a call with us. Thank you very much for watching, and everyone, have a great day. Have a great day, Yosef. Thank you. 09:17 [Music]

Build powerful automations with ease. No coding is required. Discover the benefits of ShipHero modules for queries, orders, shipments, and more. Respond instantly to events like shipments and inventory changes using Make. Connect with Stripe for billing and Weather integration for perishable items. Stay updated in real-time on statuses and holds. Streamline your business processes today with Make and ShipHero.
ShipHero API Developer Resources
- Hello everyone and welcome to another or new episode of ShipHero Feature Walkthroughs, or maybe Integration Spotlight. I'm joined today by Yosef Haas, our VP of product. So how are you today, Yosef? - I'm doing great, and how are you? - Awesome. I'm doing great. So I'm looking forward to learning more about ShipHero and its amazing features and integrations. So today, we're exploring a new integration. So what is make.com? - So make.com is an automation platform, allows you to automate tasks that you may previously have to do manually, one at a time. It's a great platform, you can build integration to pull data from many different sources, and now you can pull data from ShipHero and also do updates in ShipHero. So yeah, it's a great no-code platform. A lot of drag and drop as you'll see. Easy to work with and easy to build some really nice automations. Today, what I'm gonna do is walk you through just an example automation using the ShipHero app. So I'll give you an overview of what the automation does, show it running so you can see it actually works, and then we'll go through and actually build this automation from scratch so you can get an idea of how the process works. So what you see in front of you is what may cause a scenario, and that's just basically an automation that you can build and run. And these automations can be run either manually, one at a time, it can run on schedule, it can run based on some other triggers, so, you know, Make has a lot of different approaches to the scenarios. In this case, we're just gonna, you know, have it run manually so you can see it working. So this scenario basically takes data from a Google Sheet and updates an order in ShipHero. So in this example, let's say I have a bunch of orders in ShipHero and I wanna change the email address in bulk. So I have a Google Sheet, and then using this scenario, it's going to pull the data from the Google Sheet, find the order in ShipHero, update it, and we even have some, you know, exception handling so that if the order's not found or the email's already updated, and so based on the different results, there's different branches of what happens in this scenario. Okay, so let's see this in action. So on my screen, I split my screen and I'm showing a spreadsheet, a Google Sheet, on the left side, on the right side is this Make scenario. And as you can see on the spreadsheet, I have an order number, I have a shop name, I have the email that I wanna update it to, and then I have the status, and that's gonna update with what actually the status or the result of the operation is. So just to show you in ShipHero, you can see that the email address on this order is make-test6@shiphero.com, and I'm gonna change it to make7. That's just on that first order. So first let me run it, so you can kind of see it in action. Keep an eye on this column here, and then on the right side, you'll see things spinning as the numbers popping up, we'll talk about that, what that all means. But you can kinda see it actually progress as it goes through the operation. So I'm gonna hit run, and see things starting to happen. All right. And then you can see column D, and that's it. So what happened here? So first of all, the scenario ran, it pulled this data from the spreadsheet, it found the order in ShipHero, and it updated it. So the first one it says success updated, just to show you, if I refresh this order, it does indeed say make7, so it worked. The next one says success already updated, and basically that means that the order already had that email address, so we don't bother updating it. We just said it's already been updated. And the last one is just an example of the order is not found, so we looked for the order in ShipHero, couldn't find it, so we put that result here. And all this of course customizable, you can decide to do whatever you want based on different results, but that's just how I built this scenario. So let's just take a little close look at the scenario itself and then we'll go through actually building this from scratch. So all these round circles are essentially modules. Make refers to them as modules, and a module can really be anything. They have over 1,600 integrations that have different modules, and that's how you define what should happen in your scenario. Scenarios, you read from left to right, so this is the beginning, and then you kind of see all these dots connected to modules and then the branches that come out from here. So the first step here is Google Sheets. So Make has a Google integration, you connect to Google, you tell it what sheet, and you basically tell it to pull the data from that sheet. And then we use the iterator module to go through each row on the sheet. Then we use the ShipHero module to get the order itself, and then we use this router to decide what to do, and that's where those different statuses come from. So if we see the order needs to be updated, we go to the update order, and then we output the result. If we see that the order's already been updated, we just go straight here and update that to where it said success already updated, and if we see there's an error, we can't find the order, we go to this branch and we update it to an error. So that's basically the, you know, how the scenario works and the workflow of that scenario. And again, you can build your scenarios to do anything you want. This is just an example of a couple different modules and some of the functionality that Make has. So let's see how to build this module from scratch. So here's a blank scenario on make.com. Now the first thing you'll need to access ShipHero is a ShipHero API key. And you can get that by going to your ShipHero account developer users and add a third-party developer. Fill out this form and you'll get a API token and a refresh key. Once you have your refresh token, copy that, and that's all you need. You don't actually need the access token from the developer account. The integration with Make that we built will actually regenerate that using the refresh token. Now, back in Make, we'll start by adding that first Google Sheet module. So click on that plus, and you can see here all the different apps and integrations that Make has, so we'll just search for Google and choose Google Sheets. And then you see the modules that are part of that integration. So within an integration or within an app in Make, there's different modules that have been built, and modules are basically just prepackaged functionality, so you can see some of the different things you have for adding rows, update rows. What we want for now is get range value. Then you need to connect to Google and just do that by clicking Add. It's sign in with Google, and it'll take you through the process of connecting to your Google account. You only have to do that once. Once you have that connection, you can use it in any Make module. The next thing is to find the Google Sheet you wanna use. So easiest way to do it is, you can select from a list, and then click here, choose a file, and you can actually search for the file you wanna use. So I'll choose my Make demo file, and I'll use the order update sheet, again, that's just based on the file I'm using. And the range you wanna look at, you go back to the sheet, it's just gonna be A through D. So it's just these, you know, this range of columns that we wanna use. So we'll do A through D. Let's contain headers and A1 to D1. And that's it. So now we've set up and connected to the sheet we wanna use. So next, we'll add the iterator, and we do that just by clicking Add Another Module, and we can just search for iterator. That's a make.com module that they built. It's part of their flow control. And now we have to tell Make where is that data coming from, what is the array of data that it's using. So click on that and you can see it's actually made it very easy for us. What it does is it pulls in the columns from that Google sheet. So all we have to do is select them. And for our purposes, while we need our order number, shop name, and the update status, and you'll see why we need that in a minute. That's all you have to do is you click on that box, choose the ones you want to use, and it okay. Now, once we want to do is, first of all, we don't want to use the header, right? We have the header column, we wanna ignore that. Obviously we don't need that, that's for our scenario. We also wanna ignore any rules that we've already updated. So what we'll do is we'll click on this little wrench icon here and set up a filter. And what's that's gonna do is allow Make or allow us to tell Make which rows should I ignore, which rows should I actually do something on. So I'll set up the filter, I'll just call it skip, call anything you want. And then we wanna do is we want to, in this case, you wanna look at the row number and say greater than one. So basically we only want to do something on rows that are greater than one. That means we're gonna skip that header, that header column. Now we'll do update status, and we'll say does not equal or does not contain success. What we've done here is we've added a couple of filters where we don't wanna look at the header row and we don't wanna look at any rows where the status success or contains success or contains error. And that basically means if we rerun the scenario again, it's gonna ignore any of the ones we've already done. We don't wanna waste, you know, waste time, and waste operations on updating things again or updating ones that are errored. We just skip those. So now we want to add the ShipHero module. So all we have to do is search ShipHero and choose the module we want to use. So you can see the modules that we've built so far. We do plan on adding more. But right now, the one we want to use is the Get Orders module. Choose the connection to ShipHero. This is where you would put your refresh token in. So you just paste in your refresh token that we got before and give your connection a name, and that's going to authorize at ShipHero and complete the connection. Okay. Now, in the ShipHero Get Order module, what you have to do is define your filters, and that's done easily by clicking on the Add Search Criteria. What we wanna do, if you remember we had the order number in shop name. So we're gonna use those to find the order in ShipHero. So the first filter, we want to use order number, and we have to get that from the spreadsheet, and again, Make makes that very easy to do. So we just click on 'Value' and we choose the order number column from our spreadsheet. And then the second filter is shop name. And again, we'll pull that from the spreadsheet. And since we only really want one result, we'll just change the quantity to one and hit okay. So now so far what we've done is we've set up Make to pull the data from Google, go through each one and find that order in ShipHero. Now we need to add the router to decide which branch to go to. So we just click on our 'Flow Control' down here and go to router. And every time we click, we'll get another branch. So we'll add a couple branches and how we need to define what each branch is gonna do. So we'll do the first branch for the one where we wanna actually update. So first we're gonna do a filter. And again, so we only wanna update if obviously we found the order. So the order exists. And the email on the order doesn't already match what we have, what we wanna update it to. Here we're gonna add the condition where the email from the order, and then this red is from the ShipHero module. So these are the fields that we can look at from the result. So we'll say if the email does not equal, we'll do case insensitive the email from the spreadsheet. So if the email on ShipHero doesn't match the email on the spreadsheet. And we'll just say ID exists, that tells us we actually found the match. So we found the order in ShipHero and it doesn't match the email on the spreadsheet. We wanna run this module. This module is going to be the ShipHero, update order module. And again, we'll use that same connection we already set up. And in the update order, we need to add two pieces of information. First of all, we need the ID of the order. So here, we'll just use the legacy ID, can use the ID as well. And then we need to put in the fields to update. So email address and ShipHero comes under the shipping or billing address. So do field email address, and we wanna update it with the data from the spreadsheet. So we'll just scroll down to our spreadsheet and choose email. So basically all this is doing is going to use the ShipHero API to update the email address of this order. And the last piece is to update the Google spreadsheets. Remember, we update it to say success. So we will add the module, which is Google Sheet, and we'll choose update a cell. So here again, we have to choose the sheet that we wanna update. And now for the cell, remember it's gonna be column D. So in order to define that we just do D and then the row that we're working on the spreadsheet. So we do row numbers. So row number is something that Make exposes in that module. So we wanna update, if we're on the second row, this would be D2, and the value is again, we'll just call it success, updated. Now let's look at one or let's add the branch where the email address has already been updated. So again, we'll make a filter. And in this case, the condition will be where the email equals the email on the spreadsheet. So we'll do case insensitive. So basically if the email address and ShipHero already matches the email on the spreadsheet, we're gonna go on this branch. So we'll just do that same Google Sheet and we'll do update a cell. And then for this one, we'll just do success already update. And our last one, we'll do set up a filter, and this is gonna be for the branch if the order was not found. So we'll call that error. And here, we'll make this a default router. So if for some reason the other ones don't run, this will run, there was some type of error, and then we can go and look at that. So in this case we'll do the ID does not exist, which means the API did not return any results and that order was not found. And then we'll do the same Google Sheet update of cell, and we'll call it our order not found. That's our scenario. Now let's see if it actually works. So lemme go back to my spreadsheet, and I'm just gonna clear these out 'cause again, we had that filter so that if there, you know, if it does hit success or whatever, it's gonna skip it. And lemme change this to make8, just to show that it actually works. Back on the order, you can see it's make7, which we updated to before, and what we would expect and hope is that if we run that module changes to make8. So let's run this module, and we'll watch it a little closer. You can see it's going through getting the order, found it, and it's updating the order in ShipHero. Looks like we had a success. Next one's already updated and this last one we got that error. So I think it worked. Let's go back to the spreadsheet and see, and it did work. And let's double check on the order in ShipHero eight. So it all worked. So, again, a very simple module conceptually, but you can see kind of how that's set up. Now a couple things keep in mind. First of all, just to show you kind of what these numbers mean is. I can go in and see what the actual results were. So if I click on that, I can see each operation and what it actually found. So like in this case it found this order, here's all the details of the order. I can see the operation of updating it. So what I updated it to. So if something weird is happening. You wanna understand what's happening, you can go and actually see what Make did for each one of those operations. If there's an error, it'll show you that as well. So it'll show you either the error from the API or some error in your configuration on Make. So they make it really easy to kind of dive in and see what actually happened when this scenario ran. Another thing to keep in mind is each one of these things that runs is what Make's called an operation. And actually if we go back to our integration or the scenario, we can see history, and see every time we ran and the details. But one thing you wanna keep in mind is that time I ran, it was 11 operations. So each operation, and that's important because operations are how Make charges. So if you go to their pricing page, you can see how many operations are included in their pricing plans. But keep in mind, you know, looking for and updating three orders was 11 operations. So this Make works phenomenally well for doing these types of things, but at huge scale, that's where some of the costs may start adding up because they do charge for operation and doing something even though it's fairly simple, you know, running it once was 11 operations. I definitely recommend looking at your scenarios and understanding how many operations you expect to use. Sometimes you can cut out certain operations, you know, maybe we don't need to update it differently, if it was success, we can just skip that one, or, you know, combine some of these operations. But that is something to keep in mind because even while you're testing and you're developing your scenario, you may go through a lot of operations and that could add up. Another thing Make is really great for is doing proof of concepts for workflows. So if you want to build out some workflow using the API, but you want to just do it fast and just see if it works and, you know, prove it out, Make work great for that, and then if you see it's using too many operations, you can always use the API directly. But being able to do that using this user interface makes it a lot easier than running a lot of code. So it's another great use case for Make. - So clearly this new tool integration has a lot of potential and it's super useful. So Yosef, do you have any recommendations for anyone who wants to start building a new automation or scenario on make.com? - Yeah, so Make has what they call templates, and you can, you know, go to templates and just kind of see what's possible. One thing we will be doing is publishing the scenario we just built as a template so you can just, you know, get started with it, and templates allow you basically to use the scenario that's been prebuilt, and, you know, you plug in your authentication, you connect to Google, you use your API key, but you can basically use the exact same, you know, steps that we built. But you can also see Make has many, many prebuilt templates. You can build your own and share them as well. But, you know, the possibilities are endless, limited only by your imagination. But yeah, I definitely recommend just, you know, finding a template that you want to use, creating it, right, creating the scenario, and just looking through it, running it, seeing how it works so you understand kind of that the Make workflow. Another nice thing you can do is every scenario that's built can be pretty easily shared. And the way to do that is if you go into this scenario and export the blueprint, and the blueprint is basically a JSON file that, you know, defines the scenario. So, you know, this can be shared, you can send somebody, they could just import it and, you know, paste it into their scenario builder and it'll add all the modules. So this is a great way of sharing a scenario that maybe you built, you want someone else to use it or someone else to see it. Those blueprints can be exported and sent to anybody. So if you make a really cool scenario, you wanna share it, you can take your scenario and create a template out of it, and then, you know, publish it and share it with the wider community. So if you come up with a great workflow that involves ShipHero, you know, feel free to make a template, and you know, other people can take advantage of the same thing. We did also add a make.com category to our developer community so you can discuss, you know, different scenarios, different workflows that you build, ask questions about the modules, the ShipHero module. We can't really provide support for Make itself. So if you're, you know, if you're having trouble setting up your scenario, Make has their own community, they have, you know, many videos and a help site to help you with that. But if you do have any questions about the actual ShipHero modules or requests, recommendations, feedback, we'd love to hear about it at community.shiphero.com. So that's an overview of Make. Again, I definitely recommend exploring it, creating a free account, seeing what you can do. It's really easy to get started. So use a ShipHero modules, get some orders, update some orders, and think about how you can use this to make your day-to-day job easier and more efficient. - Awesome Yosef. Thank you very much. This integration is really, really amazing, has tons of potential. Like like you mentioned, the possibilities are endless. And so if you'd like to check out other feature walkthroughs on the top right partner right now, and if you're ready to unlock your eCommerce fulfillment superpowers, visit shiphero.com to schedule a call with us. Thank you for watching and have a great day.
How much is knowing what your warehouse team is doing in your warehouse worth to you? This is the question ShipHero's WMS team asked when we decided to design WorkforceHero. Labor is one of the most expensive aspects of any business and low productivity or mismanagement can mean a huge hit to your profitability.
That's why ShipHero's new WMS feature, WorkforceHero is here to help you increase revenue, and make the most of your warehouse teams. By leveraging all of the data ShipHero is already collecting, including picking and packing efficiency, worker productivity and total shipment numbers, WorkforceHero enables you to make the most of your workforce. And it allows your employees to manage their breaks and assume accountability throughout their shift. Plus, your managers can make changes throughout the day to make sure that SLAs and high prioirty projects are completed on time and on budget.
Hello everyone and welcome to another episode of ShipHero featured walkthroughs. I'm joined today by Valerie Cancian, our associate product manager. So how are you today Val? I'm doing fantastic. How are you Danno? Good, for asking. So today we'll explore one of my favorite ShipHero features, WorkforceHero. Val, please tell us everything about this awesome feature. Absolutely, I'm very excited. Happy to hear it's one of your favorite features. We're really proud of this one too. What WorkforceHero is is dashboard that's available now where you can use your job assignment for your entire team in a single view. This is very useful, 'cause it allows you to detect if your team is on balance. For example, as you'll see here, we have nine, oh sorry, nine people packing with four people picking. You wanna make sure we have a clear ratio of pickers to packers and you'll be able to see a clear view of where everyone is working to make sure that you have the right people in the right place at the right time doing the right thing. You also can see in this view if someone's on a break and for how long you don't need to call out like "hey, where's so and so?" They're on a break. You can see if they're on a break straight from this screen as well as seeing how much time is being spent on the activities. So before I deep dive into this dashboard though, I actually wanted to take a step back, go over the permissions so that you can access this page as well as some of the settings 'cause you'll see here, we have some red alerts, there's some settings on how you could set those alert thresholds. I'm gonna show you that and then we'll come back to this screen. So just some housekeeping if you will. So in order to access this page, you will need WorkforceHero permission. This is important 'cause you're not gonna want anyone to just access this page. This is usually more of like a manager or an ops role or if you're, you know, running multiple warehouses and you wanna see these views, this is gonna be very important for you. But you might not want just anyone accessing this page and seeing what's going on. So on our users and role permissions there is a permission called WorkforceHero. You'll need to give a user access here in order for them to be able to view this board. If you are an admin, you will already have access, but otherwise you'll need to do that here. Also you're gonna wanna set up some settings. So under Settings, so your navigation bar, on your left hand side here, you go down the bottom you'll see settings. There is a new setting for WorkforceHero and this allows you to set your alert thresholds. You kind of got a sneak peek when we were looking at the board in the beginning. You'll see sometimes someone will light up as red. So why was that happening? That's because we are tracking inactivity for pickers and packers. So they pack in order, how long before they pack another order before we want to trigger an alert or picking idle time? They pick something and then how long of a grace period do we want before they scan in another pick before sending off an alert. You know, sometimes you have to walk over, walk around the warehouse to take time. This gives a good idea if maybe something is lost or just insight on why things are taking time. That way you can show an alert. We also have alerts for your lunch, your paid break or a time that someone has no job. And these are customizable. So this is the default, but you're able to come in here and set these. So if your lunchtime is 30 minutes and someone doesn't return in 30 minutes, it'll show us right on the screen and you'll have those alerts. So very clear visibility on this new dashboard. On this navigation, so we got permission, we got our settings. You'll see that there is a section four WorkforceHero. When you expand this, we have three options. So we have our live view, which is that dashboard that we're gonna dig into. We also have a shift management and then our kiosk. Let's take a look at shifts and then we'll take a look at our kiosk. So for shift management you're able to create work shifts, assign manager or managers and then also assign people to that shift. Someone could be assigned to multiple shifts but they shouldn't be overlapping. You could have a Monday to Friday shift and a weekend shift, but you wouldn't wanna shift that overlaps 'cause then we wouldn't know when one was starting and the other one was ending, if that makes sense. So here we have a few shifts set up. We have our early shift, which is Monday to Friday, 7:30 to 3:30. We have our manager assigned and one person early, me, very early. I'm not a morning person. So that was, that was harsh. And then we have our weekend shift, which is Saturdays and Sundays. Again, we have our manager there and then you can see who was assigned. This can be edited. So you can rename it. You also can reassign managers. So if you just can edit, you know, if we don't wanna call this the early shift, we just wanna call this shift one, whatever works for you you can add multiple managers if you would like. We can add a second manager and then we can assign other people to this as well. And you can also remove someone assign more people and then just edit it. Hit Save, and you'll see it's updated. And then if you wanna create another shift, up on the top right we have create shift and you click there, you'll be able to create another shift. So if we have shift one, which is you know, early in the morning, then we can create shift two. And then you let us know what days this is. And this is very customizable, you can do, so our shift two will be nine to five. I'll keep it nice and easy. Then you'll hit next. And again you can assign your managers for that shift. And then who is working that shift? There we go. And then we can edit that as needed. All right, so you have, you assigned your shifts you have your alerts, you have your permissions. So how do we like log into these jobs? So let's go to our live view and then we'll go back to the kiosk in a moment. So as you can see here, we have our team currently assigned different jobs. You can see who's working what. But how does WorkforceHero know what jobs people are doing? Well there's one of two ways. So some jobs are actually auto detected. So picking, packing, cycle count, mobile replenishment as well as receiving. Once someone starts one of those tasks, WorkforceHero will pick it up, it will auto detect it, it'll assign them to the job and start tracking the time. So those are automatic. But you also have an option to create jobs that might be unique to your own warehouse. For example, we have something called water spider. If you want to create a unique job up on the top right we have a great job option. You can name it special projects, water spider. Maybe if you had some sort of like put away stuff, they, name it as you would like. But for these, they'll have to actually clock into the job so that we can start tracking it. So how do we clock into the job, right? So what you'll do when you start setting up WorkforceHero is you will want to print out a badge for everyone. Let me show you what that badge looks like. So here's my user, I have no job right now and I am late, so I don't go onto the morning shift. You have an option to print badge. And what this badge will look like is it will have a QR code as well as a picture. And what you will need is a QR code scanner. But what they'll do is when they have this badge printed and you can laminate it and put it on like a lanyard, they will scan this in to our kiosk and that will assign them to a job. Now again, we have a few options here. So when you sign into the kiosk, you can choose a job, you also can assign someone a job. So when they clock in, it tells 'em what they need to do. So how would you assign someone a job? So as a manager you have a few views, you have this overview here where you can get just a clear visibility into where everyone is. But we also have a table view. If you move over to the table view, it's a little bit more tactical. And here you can assign people to their next job as well as remove them from jobs. And if they forget to log out, you can do that here as well. What you'll see is you get a list of all of your users. You can see who's out, who's working by status any warnings and alerts in a clear view. So these are those that have gone over those thresholds that we set at the beginning. You can see anyone who is not currently working, 'cause they're on break, who is working and overall who is in your warehouse, see who they are, their job, there's a sub job. The next job, that's what we can assign, the time spent as well as total time. In order to assign someone a job, you can click the check box next to their name. You also can do this in bulk. So if you wanna move a group of people to a new job, you can do that. Once you check their name, you'll see there's a few options. So you can assign them a job, you can remove them from their assigned job as well as finish their shift if need be. And you hit assign jobs, you'll see you'll have your list of jobs and you can search and you can put them as a new one and hit assign. I'm not gonna do that here cause I don't want to actually assign Albert on a job right now. But that's how you would do that process. Now someone may be asking who's watching this, like hey, do they get a notification? Not yet, but we are planning in the future to be able to notify. Currently what would happen is when they do go to the kiosk, which I will show you, and they take their QR code on their badge it'll just tell them their new job. For the kiosk, this can be a few different places. So you could have a computer set up, you could have a tablet, all with QR code scanners. And these can be throughout your warehouse if you'd like. You could have them in a stationary area. And what they'll do, they'll just scan in here, give their new job assignment, it'll show if they wanna go to lunch or break or end shift when they scan in their QR code here. Now we have our jobs that are auto detected, our users can sign in to jobs, we can create jobs. So let's take a deep dive into some of the data here. I know some of you love data, you're seeing numbers, great, but how do we make those useful? How do we export them? Well good news is that is possible. So we have a few export options currently, which is on the job level as well as for the individual user. When you look over here, we'll take packing for example. And you can see this is real time things are changing colors and popping up as as I'm speaking, which is very cool. This is a real time dashboard. So you have your three dots here, oh they're done. Single item batching, right? And then you could hit view activity log. And what this will show you is for the day, and you could select the date range, so who was working on this job and for how much time. And then this can be exported. So let's look at one with a little bit more data. Multi item batch usually has a lot of people and here you'll see a list of dates and all the different employees, how much time each person spent that day on this job as well as your total time spent. And you could export this to keep a note of trends, how, what days, maybe you have more pickers what days you might need less pickers. And overall, get an idea of how much time your workforce is spending on a certain task. And as you'll see here, you can export this. It will export the date, the time, the total, all of the employees and all of the total work hours as well as the individual hours. You also could get this on the employee level, which could be good for just overall like performance reviews or keeping, just keeping track of things. So if we go to a user here or you can print their badge, you can finish the shift you can assign 'em a job also from here, just not in bulk, but you can do this one at a time. And then you can view their log history, see all the different jobs they were doing. As you can see here, these are the auto detected ones. So they started a batch and then backed out of it and went into something else. And you're seeing how much time each of those jobs were done, all of the different jobs. This person has a lot of jobs. This again can be exported. You also can add a log. So for example, maybe you didn't create a job for this but you wanna give them credit for doing it. Maybe they ran an errand, they went to the post office to pick up, I don't know, those post office bins on some packaging and you wanted to track that. You could add a job that, is it already here? Put a note, track the time and it will add it to their log. So this includes everything we're tracking on the board but you could also add additional logs there as needed. You can always reprint their badge and of course, sort this by job and date range. We are working on additional exports that will allow you to export all of your jobs at once. So keep an eye out for that. That will be coming soon. Also an export for the alerts. Going back to the table view, you can see that these are broken down as well as this is also updated in real time. As you can see it's just updated again and you can see again your alerts. So I think when it comes between which view, I think it's sort of a preference. I do think certain people are gonna want that sort of like that live dashboard view just gives them a clear take. But some might actually find more value in this view as well. 'Cause you can just see who's in your warehouse very quickly, who doesn't have an assignment? All your warnings for all your different jobs and things of that nature. And up on top here, speaking of different views, you'll see that we have our warehouse for some, you know, you're working out of this is your warehouse your workforce in that warehouse. But we understand that sometimes you might be a 3PL manager, you have multiple warehouses and you wanna see how the different warehouses are doing. You are able to, as long as your permissions allow of course, to change the view and see the information for a different warehouse. So when you click this warehouse option here, it will allow you to update which warehouse you use and then you can see the information for a different warehouse. So there's a lot of different information that WorkforceHero offers. It gives you a lot more insight on what everyone is doing and how much time is being spent. And then you can use that data to hopefully make more strategic decisions and just manage your whole warehouse a lot better. So that, is that why this is your favorite feature Danno? A lot of good data here. Absolutely. has tons of information. Its transparency is amazing. Yeah. Indeed. Definitely adds transparency to like where everyone is and what they're doing. Okay, thank you very much Val. If you'd like to check out other featured walkthroughs click on the top right corner right now. And if you're ready to unlock your eCommerce fulfillment superpowers, visit ShipHero.com to schedule a call with us. Thank you for watching and have a great day. Bye.